This article was last manually reviewed for data accuracy on 03 November 2025.
You have two primary paths for the ClickUp Google Calendar integration: the fast native two-way sync for simple task visibility, or advanced ClickUp automations. While native sync handles deadlines perfectly, custom tools like Pabbly Connect, Make, and Zapier are essential for power users who need workflows like automatically creating a ClickUp task from a new calendar event. Learn how to set up the best sync for your productivity needs today using all these options.
Quick Summary: ClickUp Google Calendar Integration
- Native two-way sync enables real-time bi-directional updates for tasks with start or due dates between ClickUp and Google Calendar.
- Native sync does not support creating ClickUp tasks from new Google Calendar events. For this, use automation platforms like Pabbly Connect, Make, or Zapier.
- Automation tools allow custom workflows such as auto-creating tasks from calendar events, status-triggered calendar updates, and custom field mapping.
- The guide covers step-by-step setups for native sync plus tutorials for automating with Pabbly Connect, Make, Zapier, and direct API integration.
- Native integration is included in all ClickUp plans (including Free), while third-party automation tools may require paid tiers depending on your usage.
- Advanced integrations via APIs offer maximum customization and control but require developer expertise and maintenance.
- Comparison tables highlight trade-offs of each method, helping choose the best fit for varying needs, team sizes, and technical skills.
- Pro tips include setting up a dedicated Google Calendar for ClickUp tasks to maintain calendar clarity.
- FAQ addresses common questions about capabilities, sync limitations, and setup troubleshooting.
ClickUp Native Two-Way Sync with Google Calendar
The easiest solution for instantly syncing scheduled tasks and deadlines is ClickUp’s built-in Google Calendar integration. You’ll get real-time two-way synchronization. This means changes in either ClickUp or Google Calendar are reflected automatically on both platforms.
Capabilities of the Native ClickUp Google Calendar Two-Way Sync
- You can sync any task with a Start Date or Due Date from a selected ClickUp view (List, Folder, or Space) to a specific Google Calendar.
- You can sync Date or time changes in either platform by updating the other immediately (two-way sync), streamlining how you manage deadlines from your calendar or within ClickUp.
- You can not create ClickUp tasks from new Google Calendar events. For this, you’ll need to set up automation separately using ClickUp Automations or third-party tools like Pabbly, Make or Zapier.
Advantage of the Native ClickUp GCal Sync
This native sync between ClickUp and Google Calendar eliminates double entry and keeps your ClickUp workspaces and Google Calendar perfectly in sync for due dates and schedules.
Step-by-Step Tutorial to Connect ClickUp to Google Calendar
Follow these steps for a fast setup using the official Google Calendar ClickUp integration:
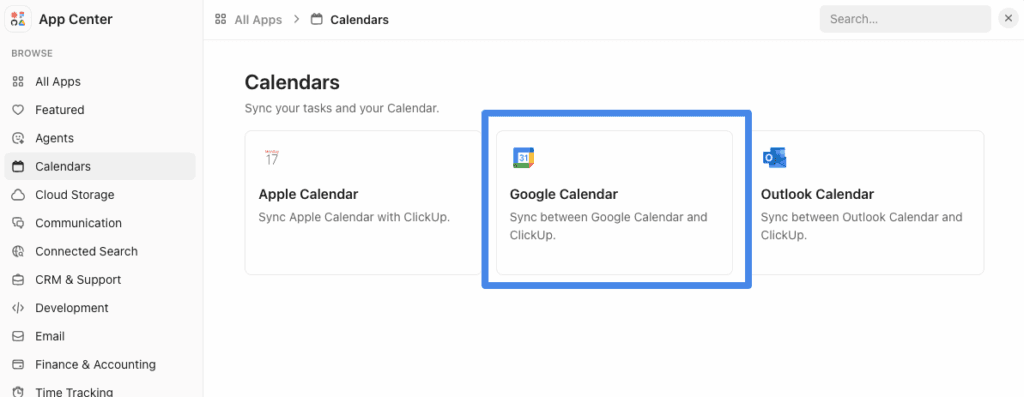
- Access the App Center
- Go to Workspace Settings in ClickUp
- Choose “App Center” or “Integrations”
- Search for and Select “Google Calendar”
- Find Google Calendar in ClickUp integrations
- Click to begin connecting accounts
- Authorize Your Google Account
- Select “Personal” for private connection
- Authenticate securely—ensure you allow necessary permissions

- Choose Which ClickUp Location and Calendar View to Sync
- Complete Setup
Pro Tip: Set up a new Google Calendar just for ClickUp tasks—this keeps your main calendar uncluttered and makes dedicated task tracking easy.
Native ClickUp Google Calendar Sync – Summary
This setup brings seamless date and schedule integration between ClickUp and Google Calendar as a quick and easy solution.
However, for advanced scenarios beyond basic task visibility, you need to choose an automation platform to supercharge the ClickUp Google Calendar automation. These platforms enable workflows like auto task creation, status-triggered calendar updates, and robust data mapping via the ClickUp API.
In the following section of this article, we will focus on users who need more than vanilla two-way sync.
Advanced ClickUp Google Calendar Sync and Automations
ClickUp separates several automaion tools (like Pabbly Connect, Make, Zapier) that can elevate your workflows. These platforms can bridge Google Calendar and ClickUp’s API, handling complex, cross-platform workflows with ease.
Why Use an Automation Tool for ClickUp Google Calendar Sync?
Using automation tools like Pabbly Connect, Make, or Zapier with ClickUp can help you to:
- Automatically create a ClickUp task when a new meeting/event is booked in Google Calendar.
- Instantly update Google Calendar events whenever a task’s status changes in ClickUp (e.g., from ‘To Do’ to ‘Complete’).
- Map fields—push custom data (like time, location, or status from ClickUp) to Google Calendar event descriptions for richer context.
- Trigger notifications or follow-up actions whenever tasks or events are modified—scalable for teams and advanced users.
In short, these automations eliminate manual updates between apps and keep stakeholders up to date with minimal friction. Integrators can precisely control how and when data syncs, enabling team-wide efficiency.
ClickUp Google Calendar Automatic Sync: Native vs. Automation Tool
| Criterion | Native Sync | Automation Tool (Pabbly/Make/Zapier) |
|---|---|---|
| Primary Goal | Task Visibility & Deadline Sync | Custom, Conditional Workflows |
| Two-Way Sync | Yes, built-in | Yes, but requires two workflows |
| Cost | Free on all plans | Free tiers; paid for scale/premium features |
| Learning Curve | Low (point-and-click setup) | Medium (requires mapping data fields) |
| Custom Fields Support | No support | Full support |
How to Automate ClickUp and Google Calendar with Pabbly Connect
For powerful, reliable automation between ClickUp and Google Calendar, Pabbly Connect stands out as the best value option for teams that need scalable, flexible integrations.
This step-by-step tutorial will guide you through setting up an automation that creates a ClickUp task whenever a new event is added to Google Calendar, saving time and ensuring your tasks always reflect your schedule accurately.
Step 1: Access Pabbly Connect
- Go to the Pabbly Connect website and sign up or log in.
- In your Pabbly dashboard, click Create New Workflow.
- Give your workflow a clear name, for example, Google Calendar to ClickUp Integration.
- Click Create to start configuring your workflow.
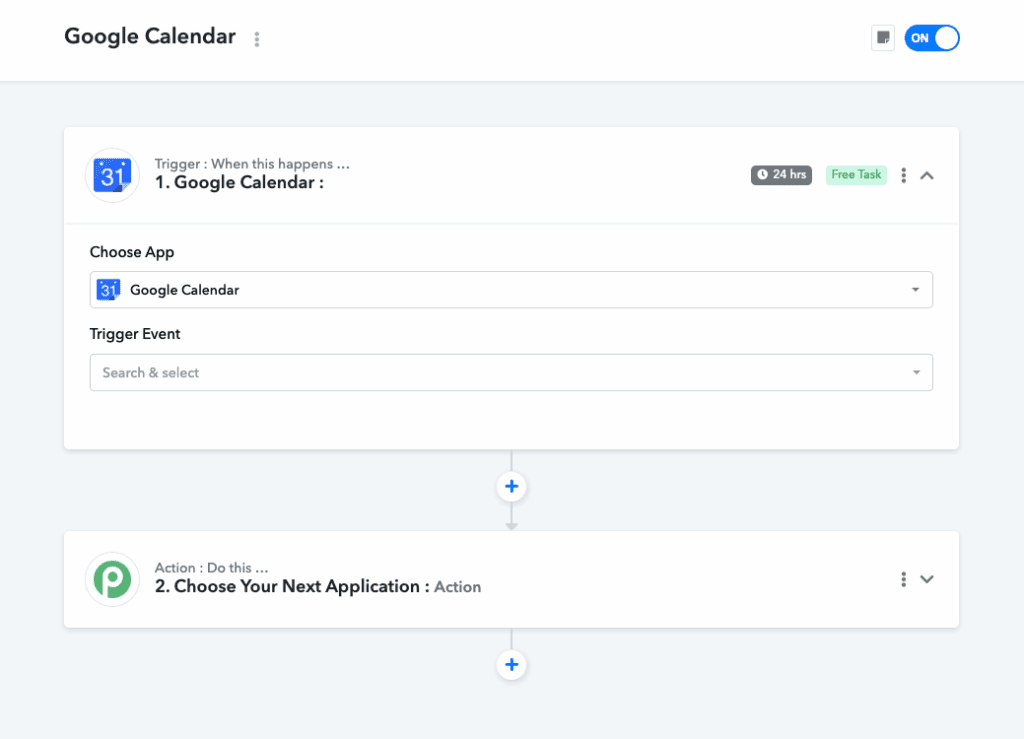
Step 2: Set Google Calendar as the Trigger App
- In the workflow builder, search for and select Google Calendar as your trigger app.
- Choose the trigger event: New Event Created. This ensures every new event in your chosen Google Calendar will trigger the workflow.
- Connect your Google Calendar account by signing in and authorizing access.
- Select the specific Google Calendar you want to monitor.
- Click Save and Send Test Request to verify the connection.
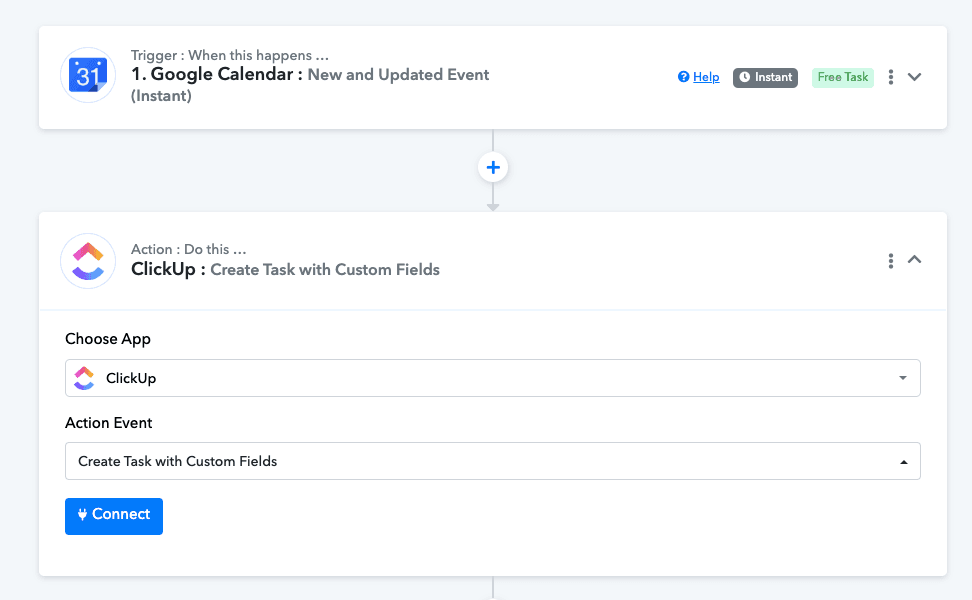
Step 3: Set ClickUp as the Action App
- Add an action step and select ClickUp as the action app.
- Choose the action event: Create Task.
- Connect your ClickUp account with Pabbly by authorizing access.
- Configure task creation settings by selecting the Workspace, Space, Folder, or List where tasks should be created.
- Map Google Calendar event details to ClickUp task fields:
- Event Title → Task Name
- Start Date/Time → Task Start Date
- Description → Task Description
- Location or other custom fields as needed
Step 4: Test and Activate Your Workflow
- Send a test to ensure a new Google Calendar event correctly creates a task in ClickUp.
- Review the created task details in ClickUp to confirm everything maps as expected.
- Once verified, switch your workflow ON to enable automatic syncing.
This setup drastically cuts down manual task entries and keeps your project management and calendar perfectly aligned, boosting operational efficiency for your workflows
Why Choose Pabbly Connect for Connecting ClickUp With Google Calendar?
- Pabbly supports high-volume automation with competitive pricing that scales with your team’s needs.
- It offers full ClickUp API integration capabilities, allowing you to map custom fields and detailed data, surpassing basic sync limitations.
- The user-friendly interface balances ease of setup with powerful, customizable workflows.
For teams seeking the best value and reliable automation for integrating ClickUp with Google Calendar, Pabbly Connect is a top recommendation to start with—you get a cost-effective, scalable, and technically robust platform engineered for real-world business demands.
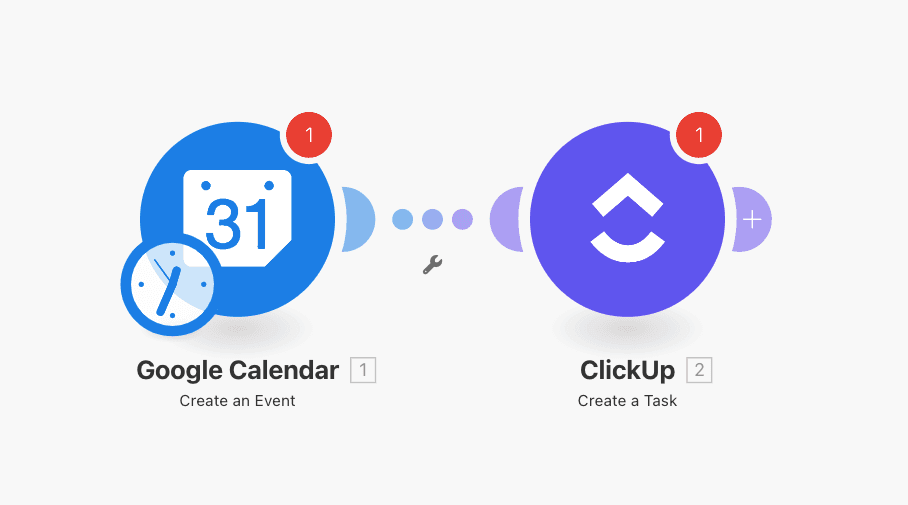
How to Automate ClickUp and Google Calendar with Make (Formerly Integromat)
For users looking to automate workflows between ClickUp and Google Calendar with powerful customization and visual scenario building, Make (formerly Integromat) offers a great balance of sophistication and ease of use.
This tutorial walks through creating an automation where new Google Calendar events generate tasks in ClickUp, perfect for keeping your projects synchronized.
Step 1: Sign Up and Create a New Scenario in Make
- Visit the Make website and sign up or log in.
- From your dashboard, click Create a new scenario.
- Search for both Google Calendar and ClickUp modules to add to your scenario canvas.
Step 2: Set Google Calendar as the Trigger Module
- Choose the Google Calendar module and select the trigger action: Watch Events.
- Connect your Google account and allow Make to access your calendars.
- Select the specific calendar you want to monitor for new events.
- Define filters if necessary (e.g., only events with certain keywords).
- Set the trigger to poll for new events at your preferred interval.
Step 3: Add and Configure ClickUp as the Action Module
- Add the ClickUp module to the scenario and select the action: Create a Task.
- Authorize your ClickUp account within Make.
- Select the Workspace, Space, Folder, and List where new tasks should be created.
- Map fields from Google Calendar:
- Event title → Task name
- Event start date/time → Task start date
- Event description → Task description
- Any other relevant details or custom fields you use in ClickUp
Step 4: Test and Activate the Scenario
- Run the scenario once manually to test that a new event in Google Calendar correctly creates a task in ClickUp.
- Verify the task creation details in ClickUp, ensuring mapping accuracy.
- Schedule the scenario to run automatically at your preferred frequency.
- Activate the scenario to enable continuous automation.
Why Use Make for ClickUp Google Calendar Sync?
- Make’s visual workflow designer allows advanced customizations, branching, and multi-step scenarios beyond simple two-way sync.
- It supports deep integration with ClickUp’s API, facilitating mapping of complex data fields and automating conditional logic.
- Flexible plans include a free tier with generous task limits, scaling as your automation needs grow.
Using Make to connect Google Calendar and ClickUp enhances productivity by automating task creation from scheduled events, eliminating redundant data entry and aligning your calendar with project management seamlessly.
For users who want powerful scenario building and an intuitive interface with robust API support, Make is a top choice.
How to Automate ClickUp and Google Calendar with Zapier
Zapier is another popular no-code automation platform connecting thousands of apps including ClickUp and Google Calendar. It allows you to automate repetitive tasks like creating ClickUp tasks from Google Calendar events, streamlining your workflow efficiently.
This step-by-step tutorial will help you to integrate Google Calendar with ClickUp using Zapier integration.
Step 1: Sign Up and Create a New Zap
- Go to the Zapier website and log in or create an account.
- Click on Create Zap to begin setting up your automation workflow.
Step 2: Set Google Calendar as the Trigger App
- Search and select Google Calendar as your trigger app.
- Set the trigger event to New Event or Event Start depending on your needs.
- Connect your Google account and authorize Zapier access.
- Choose the specific calendar you want Zapier to monitor.
- Test the trigger to confirm connection and fetch sample data.
Step 3: Configure ClickUp as the Action App
- Add ClickUp as the action app.
- Choose the action event Create Task.
- Connect your ClickUp account by authorizing Zapier.
- Select your Workspace, Space, Folder, and List where tasks will be created.
- Map the Google Calendar event data to ClickUp fields:
- Event Title → Task Name
- Event Start Date/Time → Task Start Date
- Event Description → Task Description
- Add further customization with ClickUp Custom Fields if needed.
- Test the action by creating a task from sample event data.
Step 4: Turn On Your Zap and Automate
- Once testing is successful, turn the Zap ON.
- Your workflow will now automatically create ClickUp tasks for new Google Calendar events going forward.
This setup helps unlock the productivity benefits of automating task creation and calendar events using Zapier.
Pro Tip: While Zapier is a strong automation tool widely used in many businesses, if you are seeking even more value, scalability, and nuanced API data mapping for ClickUp Google Calendar connection, platforms like Pabbly Connect and Make may serve you better.
- Pabbly Connect offers competitive pricing tailored for high-volume automation, with easy setup and rich API feature utilization.
- Make provides a highly visual scenario builder for complex multi-step workflows and in-depth data integration.
Both platforms excel in advanced field mapping, cost efficiency, and flexibility, making them compelling alternatives for users who want more control and value from their ClickUp Google Calendar automations.
How to Integrate ClickUp and Google Calendar Using the API
Integrating ClickUp with Google Calendar using their APIs offers ultimate customization and control. This method is ideal for developers and teams with coding resources who want fully tailored workflows beyond standard integrations. Here’s a practical step-by-step process:
Step 1: Obtain API Credentials for ClickUp and Google Calendar
- Google Calendar API:
- Go to the Google Cloud Console.
- Create or select a project, then enable the Google Calendar API.
- Set up OAuth 2.0 credentials (Client ID and Client Secret) for secure authentication.
- ClickUp API:
- In your ClickUp account, navigate to Settings > Apps > API Tokens.
- Generate a personal API token for authentication.
Step 2: Authenticate and Authorize Access
- Implement OAuth 2.0 flows to obtain access tokens for Google Calendar.
- Use ClickUp API token directly in request headers for authentication.
- Ensure tokens have proper scopes/permissions for reading and writing calendar events and ClickUp tasks.
Step 3: Monitor Google Calendar Events
- Use the Google Calendar API’s Events.watch endpoint or periodic polling to detect new or updated calendar events.
- Use webhooks if real-time notifications are essential.
- Filter events based on calendar ID, event status, or specific criteria to trigger task creation.
Step 4: Create or Update Tasks in ClickUp
- Use ClickUp’s Create Task API endpoint to generate tasks corresponding to calendar events.
- Map relevant event data fields to task fields:
- Event summary → Task name
- Event start time → Task start date
- Event description → Task description
- Location, attendees, and custom fields as applicable
- For updates in calendar events, use the Update Task endpoint to keep ClickUp in sync.
Step 5: Handle Sync Conflicts and Errors
- Implement logic for handling duplicates, update conflicts, and API rate limits.
- Log errors to assist debugging and to maintain sync integrity.
Pro Tip: Building your own API integration requires substantial development and ongoing maintenance.
For most teams, automation platforms like Pabbly Connect and Make provide faster, more cost-effective, and scalable options.
- These automation platforms offer out-of-the-box connectors to both Google Calendar and ClickUp, drastically reducing setup time.
- Advanced features like custom field mapping, conditional workflows, and user-friendly visual designers come included.
- Pricing models and support handle scaling needs without requiring dedicated developer resources.
- These platforms abstract API complexities, freeing your team to focus on core business tasks.
While API integration offers unmatched flexibility for developers, for businesses seeking efficient, reliable ClickUp Google Calendar synchronization with less overhead, Pabbly Connect or Make often deliver a superior balance of power, affordability, and ease of use.
ClickUp Google Calendar Integration: Full Comparison of All Options
| Criterion | Native ClickUp Sync | Pabbly Connect | Make | Zapier | API Integration |
|---|---|---|---|---|---|
| Integration Type | Built-in two-way sync | No-code automation platform | No-code automation platform | No-code automation platform | Custom-coded direct API connection |
| Primary Use Case | Quick task and calendar deadline sync | High-volume, flexible, reliable automation | Visual multi-step workflows, complex automation | Simple to moderate automations | Fully customized workflows and data control |
| Setup Complexity | Very low, point-and-click | Low-medium, intuitive UI | Medium, visual builder with learning curve | Low-medium, familiar UI | High, requires developer expertise |
| Cost | Free on all plans | Competitive pricing with scale incentives | Free tier available, paid for more tasks | Free tier available, paid for premium features | Cost of development and maintenance |
| Two-Way Sync Support | Yes, bi-directional task-date sync | Yes, but often requires separate workflows | Yes, supports multi-step bi-directional sync | Yes, but may require multiple Zaps | Full control, bi-directional as programmed |
| Custom Field Support | Limited | Full support for custom fields | Full support and conditional logic | Limited compared to Pabbly and Make | Unlimited, based on API schema |
| Automation Flexibility | Basic task due dates and deadlines | Advanced conditional workflows and triggers | Highly customizable and conditional workflows | Moderate conditional and multi-step workflows | Unlimited via code |
| Error Handling & Logging | Minimal | Built-in error notifications and logs | Advanced monitoring and error handling | Basic error handling | Full control but requires custom implementation |
| Scalability | Suitable for small to medium use | Highly scalable for large teams | Scales well for complex enterprise workflows | Good for small to medium automation volumes | Scales with infrastructure and coding effort |
| Ease of Maintenance | Minimal, handled by ClickUp | Low, managed platform with updates | Low-medium, visual scenario maintenance | Low, easy to update Zaps | High, developer dependent |
| Best For | Users needing fast, out-of-box two-way sync | Teams needing cost-effective, reliable scale | Users needing complex workflow orchestration | Users wanting easy entry into automation | Developers wanting full control and customization |
| Limitations | No ability to create tasks from Google Calendar events | Needs learning curve for advanced workflows | Requires investment in learning visual tools | Less flexible custom fields and advanced logic | Requires technical expertise and ongoing upkeep |
Which ClickUp Google Calendar Integration Should You Choose?
- Choose Native Sync if you want the fastest, simplest setup to sync tasks with deadlines bidirectionally without any coding or additional monthly costs.
- Choose Pabbly Connect if you want a cost-effective, scalable automation platform with robust API field mapping, suitable for teams growing automation complexity.
- Choose Make if your workflows require extensive multi-step automations, visual scenario building, and conditional logic with strong custom field support.
- Choose Zapier if you need ease of use with a popular platform for simpler automations but without deep API customizations or complex workflows.
- Choose Direct API Integration if you require full control over synchronization logic, custom fields mapping, and workflow behavior, have developer resources, and want to build a highly specific integration.
For most teams, Pabbly Connect and Make strike an optimal balance between power, flexibility, cost, and ease of maintenance compared to the technical overhead of direct API integration or the feature limitations of native sync and Zapier.
Wrapping Up
Choosing the right integration solution for syncing ClickUp and Google Calendar depends on your specific needs, technical skills, and budget. While native integrations offer quick setup for basic two-way syncing, automation platforms bring greater power and flexibility. Tools like Make and Pabbly Connect excel by combining ease of use with robust features—empowering users to build complex, customizable workflows that scale smoothly with team growth.
Make stands out for its visual, highly customizable scenario builder, ideal for users seeking intricate multi-step automations. Pabbly Connect impresses with its competitive pricing and straightforward interface, delivering excellent value—especially for high-volume automation requirements. Both platforms abstract much of the technical complexity involved with direct API usage, making automation more accessible without sacrificing advanced capability.
Ultimately, whether prioritizing powerful customization or cost-effective scalability, Make and Pabbly Connect represent compelling, future-proof choices for ClickUp-Google Calendar integration. They offer the blend of functionality and user experience that can significantly boost your productivity and operational efficiency while minimizing maintenance overhead. Choosing either positions you to harness the full potential of automation tailored to your business demands.
FAQ: ClickUp Google Calendar Integration
Does ClickUp have a native Google Calendar integration?
Yes, ClickUp offers a native, two-way sync integration with Google Calendar. This feature is available on all ClickUp plans (including the Free Forever plan) and is managed through the App Center or a Calendar View in your Workspace.
How do I get my ClickUp tasks to show up in Google Calendar?
To sync tasks, you must enable the native ClickUp Google Calendar two-way sync via the App Center. Crucially, the tasks must belong to the synced Space/Folder/List and have either a Start Date or a Due Date assigned to them.
Is the native ClickUp Google Calendar sync really two-way?
Yes, the native sync is two-way. This means if you change a task’s date or time in Google Calendar, the corresponding task in ClickUp is automatically updated, and vice versa.
Can I create a ClickUp task automatically from a new Google Calendar event?
No, the native ClickUp integration does not support creating a task from a new calendar event. To achieve this, you must use a third-party automation tool like Pabbly Connect, Make, or Zapier to set up a custom workflow (Trigger: New Event to Action: Create Task).
Which ClickUp plans include the Google Calendar integration?
The core Google Calendar integration (the native two-way sync) is included in the Free Forever plan and all paid ClickUp plans. Advanced automations via third-party tools may require a paid tier on those respective platforms.
Leave a Reply